Jump ahead to:
ToggleIntroduction
With Microsoft ending support of Windows Server 2008/2008 R2 on January 14, 2020, in this blog post I explain on how to migrate your Microsoft Root Certificate Authority running on Windows Server 2003/2008/2008 R2 to Windows 2016. This post also explains on how to migrate your Certification Authority key from Cryptographic Service Provider (CSP) to a Key Storage Provider and on how to migrate from SHA1 to SHA2 (SHA256). Please note similar steps can be used to migrate from Windows 2008 R2/2012 R2 to Windows 2016 and or Windows Server 2019.
Backup Windows Server 2008/2008 R2 Certificate Authority Database And Its Configuration
- Log into your current CA Windows 2008/2008 R2 as member of the local administrator group
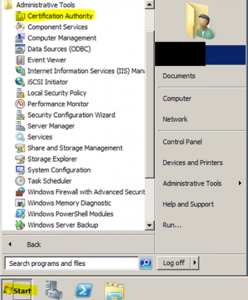
- Go to Start –> Administrator Tools –> Certificate Authority
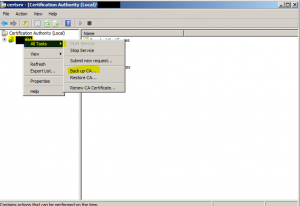
Right Click on your CA Server Node and select Back up CA –> All Tasks –> Back up CA
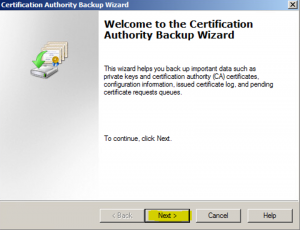
- “Certification Authority Backup Wizard” will open up, click “Next” to continue
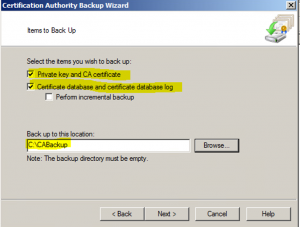
- In the “Items to Back UP” wizard select “Private key and CA certificate” and “Certificate database and certificate database log”. Take note of the backup file path location where you will be saving the backup. Click on “Next” to continue.
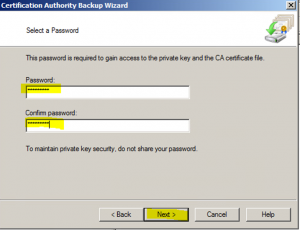
- Provide a password to protect the private key and CA certificate file. Once password is provided click on “Next” to continue
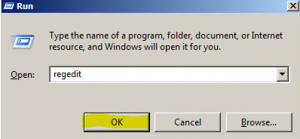
- Backup the CA Registration Settings via regedit –> Start –> Run and type in regedit and click “OK”
- Expand the following key path
HKEY_LOCAL_MACHINE\SYSTEM\CurrentControlSet\Services\CertSvconce expanded Right Click on “Configuration” key and click on “Export”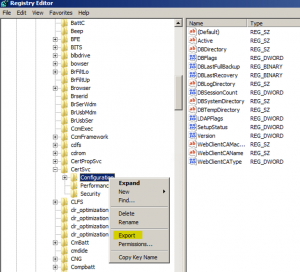
- Provide a name and location to save the reg backup file. I suggest saving it in the same location of the CA backup example –> C:\CABackup
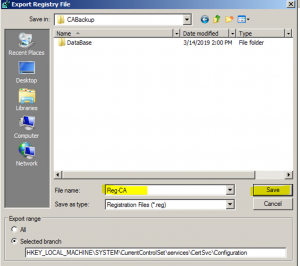
Note: Files that you should currently have in your backup location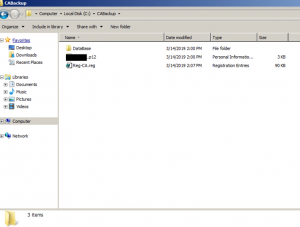
At this point we now have a backup of your current CA files, move them off to the new 2016 CA server or to another server if the new CA 2016 server has not been built yet.
Uninstall CA From Existing 2008/2008 R2 Server
Since we now have a back up the our CA files and have moved them off the current 2008/2008 R2 CA server, it is time to uninstall the CA role from the existing CA server.
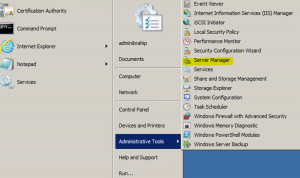
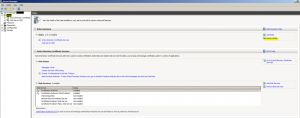
- Negative to the Server Manager and select the “Remove Roles” under Roles –> Start –> Administrative Tools –> Server Manager
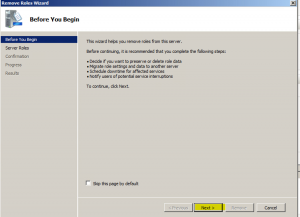
- Click “Next” at the Before You Begin wizard
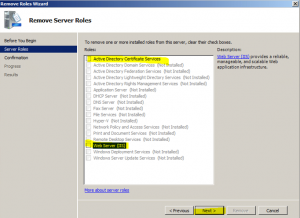
- At the “Remove Server Roles” wizard page deselect Active Directory Certificate Services” and “Web Server (IIS)” and click “Next”. Note if you still require Web Server (IIS) leave it checked
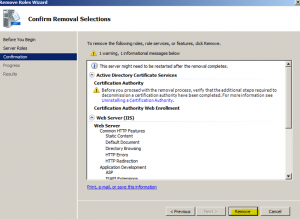
- At the “Confirm Removal Selections” wizard page the output will look similar to the image below and might give you a warring, click on the “Remove” button. Note, be patient this process might take some time to complete
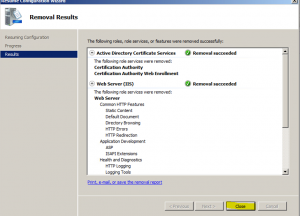
- At the “Removal Results” wizard page review the messages and click “Close” and perform a reboot of the server to complete the uninstall
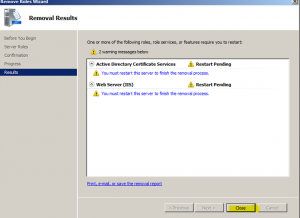
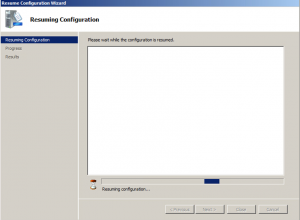
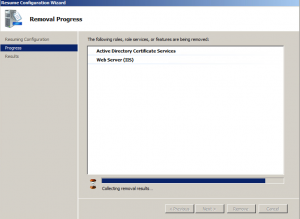
- Once server has been rebooted log back in and the uninstall process will continue, once completed click on the “Close” button as shown in the next 3 images
At this point, we have completed uninstalling the CA role, the next step is to get the Windows 2016 CA services installed and configured. If the existing 2008/2008 R2 CA server is no longer needed it is recommended to remove it from your domain and delete the server (if it’s virtual) or power down if it’s physical. IMPORTANT NOTE, the new 2016 CA server should have the same computer name of the old 2008/2008 R2 CA server. This document DOES NOT explain how to use another name for your new 2016 CA server.
Install Windows 2016 Certificate Services
Assumption: A new virtual machine (preferred option) or physical 2016 server has been provisioned and joined to the domain with the same computer name as your old CA 2008/2008 R2 server. If possible, re-use the same IP as the old CA server.
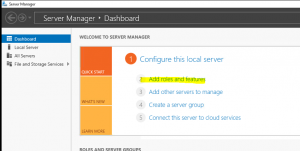
- Log in to Windows 2016 as Domain Administrator or member of local administrator group and navigate to Server Manager –> Add roles and features
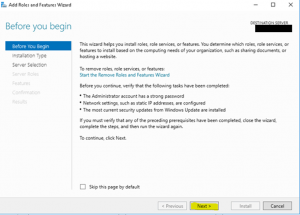
- At the “Add roles and Feature” wizard page click on “Next” to continue
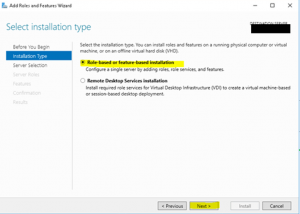
- At the “Installation Type” wizard page select “Role-based or feature-based installation” and click on “Next”
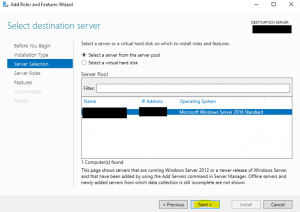
- At the “Sever Selection” wizard page keep the defaults and click “Next”
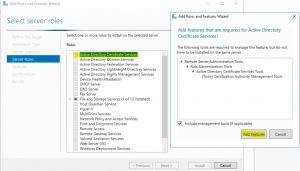
- At the “Server Roles” wizard page, select “Active Directory Service” at the pop up window acknowledge the require features that are required and click on “Add Features” to add them
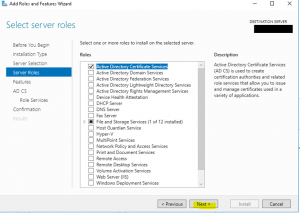
- Click “Next to continue
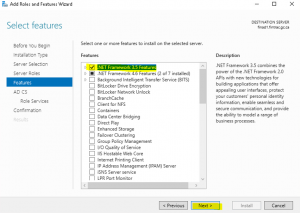
- At the “Features” wizard page select “.NET Framework 3.5 Features” and click “Next”
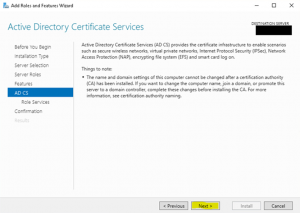
- At the “AD CA” wizard, page click “Next” to accept the defaults
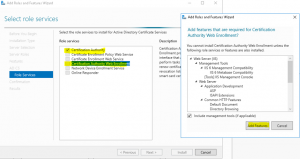
- At the “Role Services”, page select “Certificate Authority” and “Certificate Authority Web Enrollment”. At the pop up window acknowledge the require features that are required and click on “Add Features” to add them
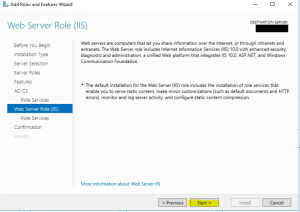
- Since Certification Authority Web Enrollment was selected, it will require IIS. It will give you a brief description about IIS. Select “Next” to continue
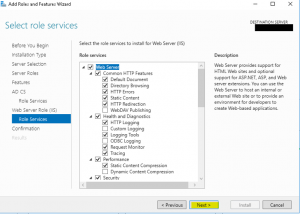
- At the “Role Services” wizard page, it gives you an option to add IIS role services. In my use case will leave it as default and click “Next” to continue
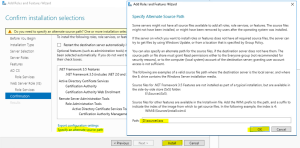
- Since we specified we wanted .NET Framework 3.5 features we need to provide an alternative source path to the “Microsoft-windows-netfx3-ondemand-package” cab file. Extract the file from the 2016 ISO or mount the 2016 ISO and point to the “sxs” directory located in sources –> sxs folder of the 2016 ISO. Click on “Install” to continue
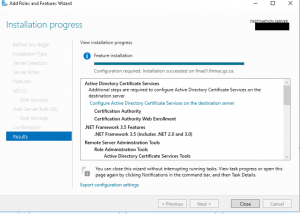
- Once installation completes you can close the wizard
Configure AD CS
**Important Note** Perform the below steps as a user that is part of the “Enterprise Administrator” AD group
- Log in to the newly created 2016 server as an Enterprise Administrator and navigate to Server Manager –> AD CS
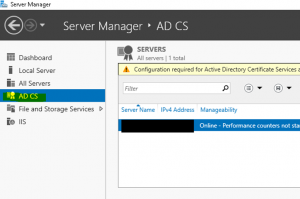
- On the right hand panel, a message will be displayed claiming “Configuration required for Active Directory Certificate Services…” click on “More” as shown below

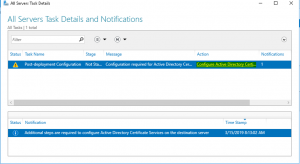
- On the “All Servers Task Details and Notifications” wizard page click on “Configure Active Directory Certificate Service….” as shown below
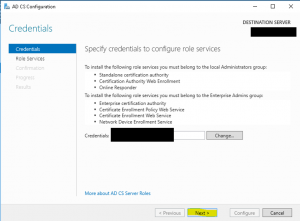
- On the “Role Configuration” wizard page, it gives you the option to change the credential, if you are already logged as a member of the “Enterprise Administrator” than click next if not specify a user that is a member of the “Enterprise Administrator” group
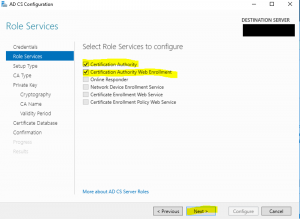
- On the “Role Services” wizard page, select “Certification Authority” and “Certification Authority Web Enrollment” and click on “Next” as shown in the image below
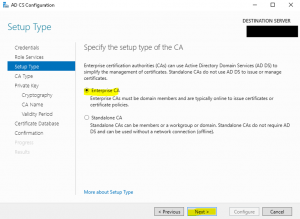
- On the “Setup Type”, wizard page select “Enterprise CA” and click “Next” as shown in the image below
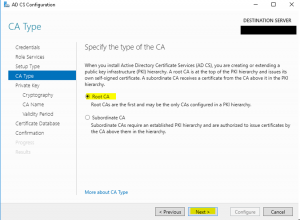
- On the “CA Type” wizard page, select “Root CA” as the CA type and click on “Next” as shown in the image below
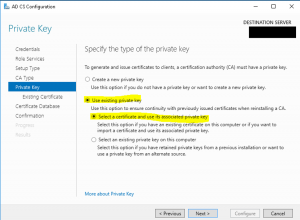
- On the “Private Key” wizard page, select “Use existing private key” and “Select a certificate and use its associated private key” click on “Next” as shown in the image below
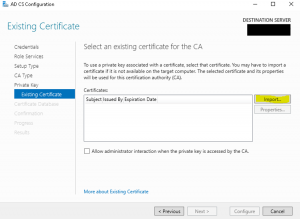
- On the “Existing Certificate” wizard page, select “Import” as shown in the image below
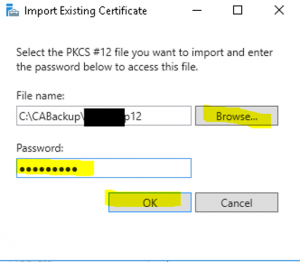
- On the “Importing Existing Certificate” wizard page select the key we backed up during the backup process (Backup Windows Server 2008/2008 R2 Certificate Authority Database And Its Configuration) from the Windows 2008/2008 R2 server and provide the password we used to encrypt the key and click “OK” as shown in the image below
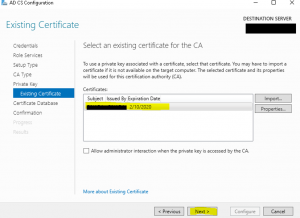
- Once the key gets imported successfully select the imported certificate and click on “Next” as shown in the image below
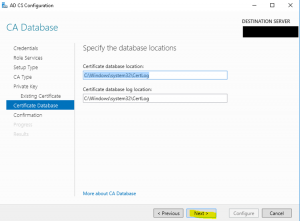
- On the “Certificate Database” wizard page, define where you like to store the certificate database if you do not want to accept the defaults. In this use case we have accepted the defaults, click “Next” as shown in the image below
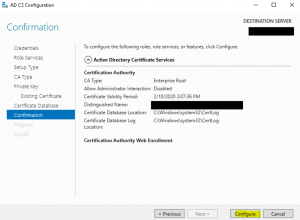
- On the “Configuration” wizard page it will provide you an overview of the configuration confirmation, if you are satisfied click on “Configure” as shown in the image below
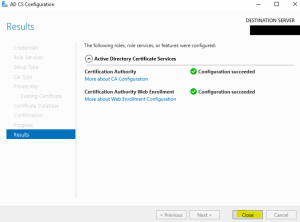
- On the “Result” wizard page click on “Close” as the installation is now complete as shown in the image below
Restore Certificate Database And Its Configuration
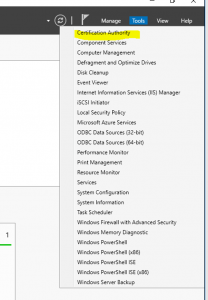
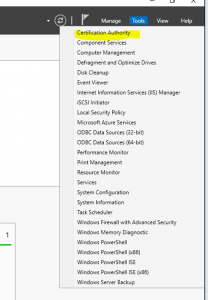
- Go to Server Manager –> Tools –> Certificate Authority as shown in the image below
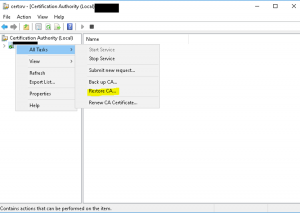
- Within Certification Authority, right click on the CA server node –> All Tasks –> Restore CA as shown in the image below
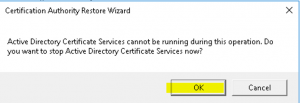
- On the “Certification Authority Restore Wizard” click “OK” you be prompted to stop the ADCS services as shown in the image below
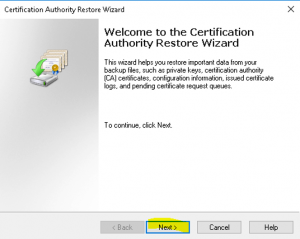
- At the “Welcome to the Certification Authority Restore Wizard” click on “Next” as shown in the image below
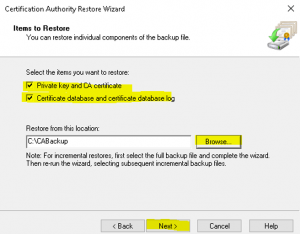
- At the “Items to Restore” wizard page select “Private key and CA certificate” and “Certificate database and certificate database log”. Browse to stored backup location of the backup files we took earlier and click on “Next” as shown in the image below
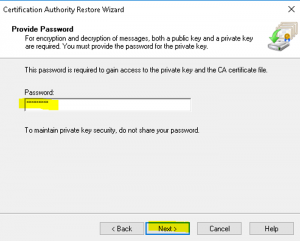
- At the “Provide Password” wizard page, enter the password you used to encrypt the backup files and click “Next” as shown in the image below
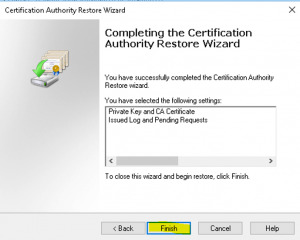
- At the “Completing the Certification Authority Restore Wizard” wizard page, click on “Finish” to complete the import process as shown in the image below
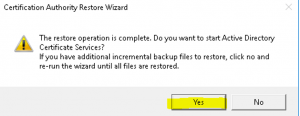
- Once the restore is complete it will ask you to start ADCS, click “Yes” as shown in the image below
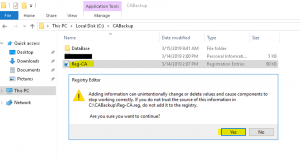
 During the CA backup process, we exported a registry key; it is time to restore this key. Follow the steps below to complete the restore of the registry key.
 - Navigate to the backup location of your CA backup files and double click on the registry key to import. On the “Are you sure you want to continue” prompt click “Yes” as shown in the image below
- Once the import of the registry key is complete click on “OK” as shown in the image below

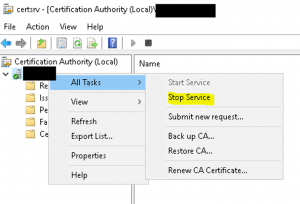
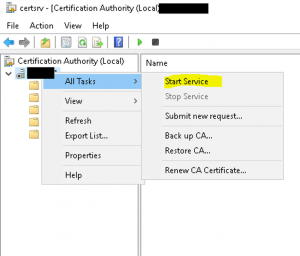
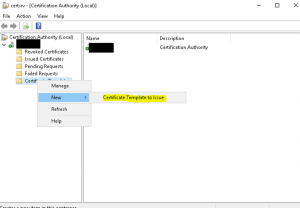
- Restart the certificate services by stopping and starting the CA by navigating to the Certification Authority, right click on the CA server node –> All Tasks –> Stop Service as shown in the images below
Migrate Certification Authority Key From Cryptographic Service Provider (CSP) To A Key Storage Provider (KSP)
If you have installed an enterprise or standalone certification authority (CA) that uses Cryptographic Service Provider (CSP) and want to upgrade your CA to use SHA2 (SHA256) than you must migrate that key to a Key Storage Provider (KSP). This migration would than let the CA support the latest enhanced key storage mechanism and stronger key and signature algorithms.
How To Check If My Certification Authority Key Is Cryptographic Service Provider or Key Storage Provider (KSP)
- Go to Server Manager –> Tools –> Certificate Authority as shown in the image below
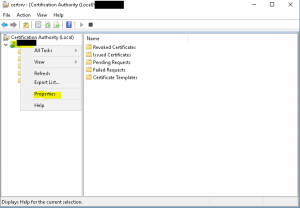
- Right click on the CA server node –> All Tasks –> Properties as shown in the image below
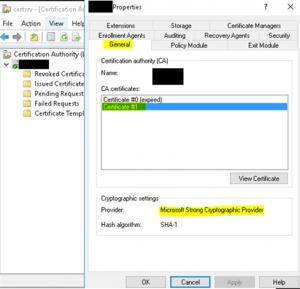
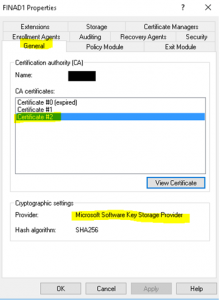
- Backup your CA settings using elevated PowerShell. Enter the following command within PowerShell along with a password as shown in the image below. *Note* you will be prompted to enter a password
Backup-CARoleService –path C:\CABackup\2016CABackup –Password (Read-Host –Prompt “Enter Password” -AsSecureString)- Backup your CertSvc registry key by running the following command within the same PowerShell window as shown in the image below
reg export HKLM\SYSTEM\CurrentControlSet\services\CertSvc c:\CABackup\2016CABackup\CA-registry.reg- Backup your CertSvc registry key by running the following command within the same PowerShell window as shown in the image below

- Validate you now have two files (.p12 and .reg) along with a database folder in your backup location directory (example 2016CABackup) as shown in the image below
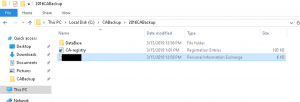
- Stop the certificate service and export an output text file of your CA store by running the following commands as shown in the image below. **NOTE, YOUR-CA-Server is the name of YOUR CA**
-
Stop-service certsvcCertutil –store my YOUR-CA-Server >C:\output.txt
- Open up the output.txt file and take a note of the hashes for the certificate(s) as shown in the image below
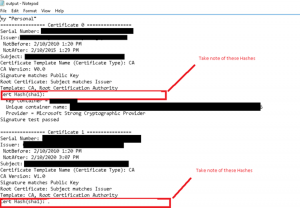
- Open up and Administrative PowerShell window and delete the Cert Hash with the following commands as shown in the image below
-
-
-
cd cert:\localmachine\myDel –deletekey <Certificate HASH>
-
-
- Using the PowerShell command below, import the p12 file we backed up earlier, you will be asked to enter your PFX password you set earlier as shown in the image below
Certutil –csp “Microsoft Software Key Storage Provider” –importpfx C:\CABackup\2016Backup\FILE-NAME-OF-THE-P12

- Using the below PoweShell command, export the file as a PXF by typing in the following commands below within an Administrative PowerShell and take note of the folder it is being saved to. Note, replace “Your_CA_Server_Node_Name” with the name of your CA server, once command is entered it will ask you to “Enter and confirm a Password”
Certutil –exportpfx my YOUR_CA_Server_Node_Name C:\CABackup\Exported-YOUR_CA_Server_Node_Name.pfx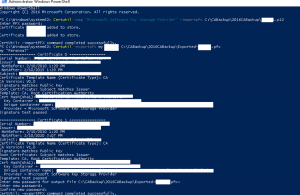
- Using the below PowerShell command, restore your CA from the PFX file you just exported by typing the command below in an Administrative PowerShell as shown in the image below
Certutil –restorekey C:\CABackup\Exported-YOUR_CA_Server_Node_Name.pfx
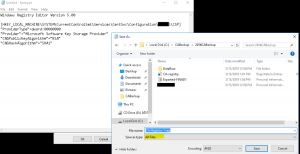
- We need to import a couple of Registry files. Note, replace YOUR_CA_Server_Node_Name with the name of your CA. Open up notepad and paste the following content below and save it as “CA-Registry-1.reg” (set the save as type to All Files) as shown in the image below
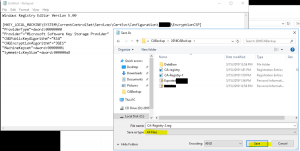
- Create another registry file called “CA-Registry-2.reg” and paste the below content replacing YOUR_CA_Server_Node_Name with name of your CA as shown in the image below
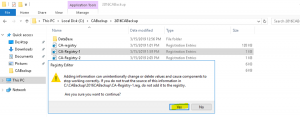
- Import both newly created registry file “CA-Registry-1” and “CA-Registry-2” as shown in the images below

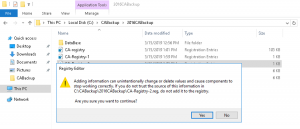
 This completes the migration of Certification Authority Key from Cryptographic Service Provider (CSP) to a Key Storage Provider (KSP). In the next section of this blog I explain the necessary steps required to change the hashing algorithm to SHA2 (SHA256).
 Migrate From SHA1 To SHA2 (SHA256)
In this section of this guide, I illustrate on how to migrate your current SHA1 to SHA2 (SHA256) which is only possible if your Certification Authority Key is a Key Storage Provider (KSP).
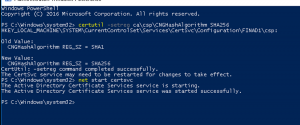
- Change the hashing algorithm to SHA2 (SHA256) and start the CA server by entering the following commands below in an Administrative PowerShell as shown in the image below
Net stop certsvcCertutil –setreg ca\csp\CNGHashAlgorithm SHA256Net start certsvc
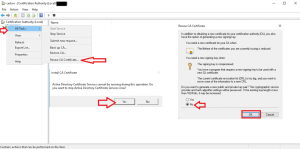
- Renew the CA cert by navigating to your CA and right click your CA Server Node –> All Task –> Renew CA Certificate and when asked select “NO” to generating a new public key as shown in the below image
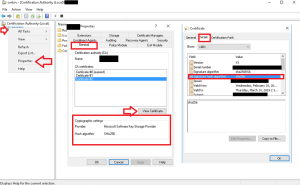
- Validate your new cert is now using SHA256 by navigating to your CA and right click your CA Server Node –> Properties –> General
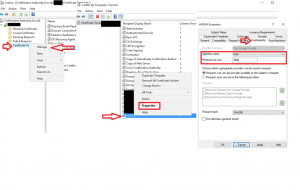
- Reissue any certificate templates that are required. Note, the certificate templates should automatically pull SHA256 as the request hash however if it doesn’t change the Algorithm to something else and re-select “RSA”. To do this navigate to your CA and right click Certificate Templates –> Manage –> “Select the template in in question” –> Right Click the template –> Properties –> Click on the “Cryptography” Tab. Once it has been changed, change it back to “RSA” and “2048” should now be displayed as the minimum key size as shown in the image below
Note, after changing the certificate template Algorithm, if the certificate template is not being listed stop and start the CA service.
Conclusion
I hope this blog post has helped you migrate your existing Microsoft Certificate Authority from a non supported Operating System to a supported Operating System.
If you have any questions or comments please leave them below!

